Storey
The Storey/Ceiling dialog opens by double-clicking on the floor designation in the object list in the "Project" mode (see „Project“ Mode).
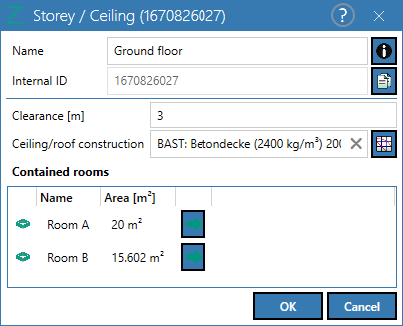
Dialog options
- Name, Memo-field
 , Internal ID: see Common Input Data
 - Clearance (m): corresponds with the storey height entered in the Edit storeys dialog (see Edit Storeys)
- Ceiling/roof construction: display/select of the ceiling or roof construction closing the room. To change the construction click on the respective selection field
 , click
  to delete.
Note
In each floor object, the main construction of the ceiling is defined, which initially applies to all rooms on this floor. A room located above in the floor or its main construction for the floor locally overwrites the definition of the floor ceiling below.
Note
An eventually installed suspended ceiling (which acts as an additional layer at the ceiling), is selected via the Room dialog (see Room). The same applies to a flanking ceiling or roof construction whose flank transmission is described by Dn,f or Dn,f,w.
- „Contained rooms" table: All rooms of the current floor are displayed in a table.After clicking on the green arrow
 in the last column, the corresponding Room dialog (see Room) opens.