Junction
Open the Junction dialog
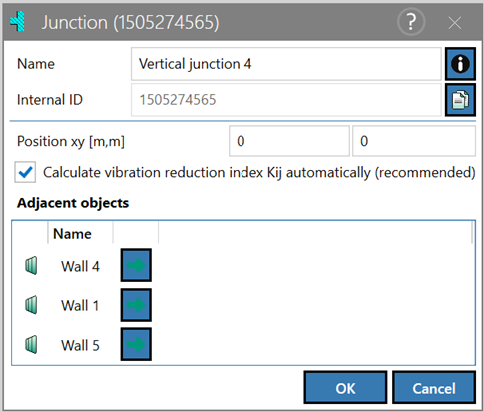
Open the dialog of a junction between walls in the 2D view is done by double-clicking on a junction in the Project mode. The call of junctions at ceilings/floors is done via the wall dialog of the wall that is connected to the respective junction (see Wall). The junction can be accessed in the lower part of the wall dialog. In addition to the call via the 2D view, the list box can be filtered in the Project mode for the junction entries and then any entry can be opened.
Note
For junctions between vertical room pairs, make sure that the upper junction of the lower room does not correspond to the lower junction of the room above. This structure affects the creation of user defined vibration reduction indexes for vertical room pairs, see section Edge conditions/Limitations on use.
Edge conditions/Limitations on use
Dialog options
- Name, Memo-field
 , Internal ID: see Common Input Data
 - Position xy (m, m): center coordinate of the junction referring to the origin in the xy plane
If the option "Calculate vibration reduction index Kij automatically (recommended)" is activated, CadnaB will use automatic the automatic assignment of junction types (see Automatic assignment of Junction Types) for the flanking transmissions calculation. If this option is deactivated, the vibration reduction index can be defined manually (see User defined vibration reduction index). By default, automatic assignment of junction types including the corresponding calculation is activated in CadnaB.
If the calculation standard DIN 4109 is set, it is possible to enter a vibration reduction index correction ∆Kij, which is taken into account for all flank paths running over this junction.
"Adjacent objects" table: shows the elements (walls) coupled at this junction.
After clicking on the green arrow  in the last column, the corresponding Wall dialog (see Wall) opens.