Common Input Data
Name, Memo-Window, ID, ObjectTree, Master
see Dialog Options Name, ID, INFO, ObjectTree, Master in the manual "Introduction to CadnaA"
Dialog Railway
The dialog Railway offers two display modes, depending on whether the selected calculation standard uses an A-weighted emission parameter or emission spectra.
Note the subsequent remark regarding the validity of the specification of emission with standards using different sub-sources (see Emission Parameter).
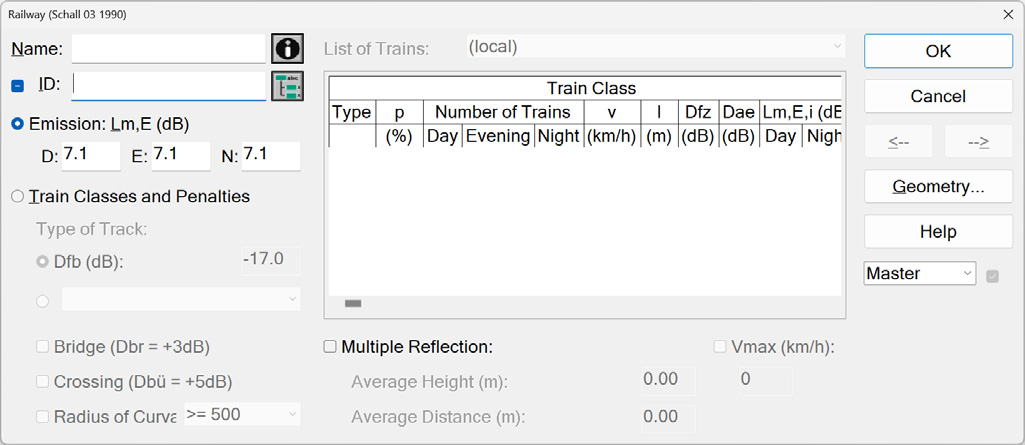
Dialog Railway with A-weighted emission parameter (Schall 03 - 1990)
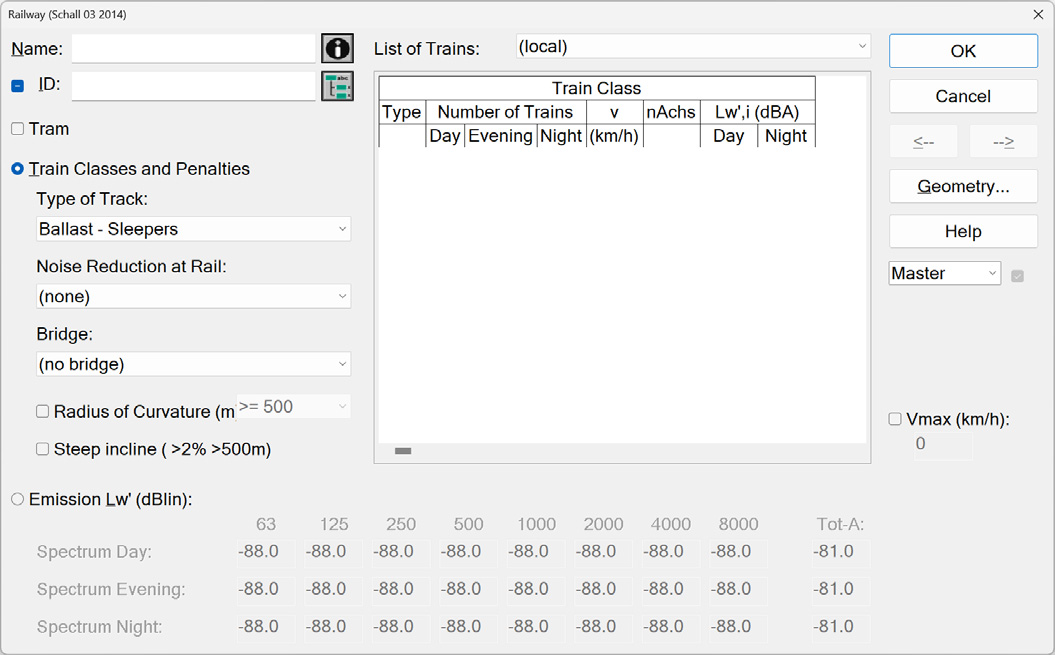
Dialog Railway with spectral emission (Schall 03 - 2014)
Emission
Emission Parameter
When the option „Emission“ is selected, values for the standard-specific emission parameter can be entered for the daily periods Day/Evening/Night (D/E/N). Whether all three periods are relevant for the calculation depends on the selected railway standard and/or on the option „Use Non-Standard Reference Time D/E/N“ on the „Railway“ tab (see e.g. chapter Schall 03 (1990)).
Note
In case the selected calculation standard makes use of sub-sources at different source heights (with A-weighted or spectral emission), the specification of the emission is correct only when using the option „Train Classes and Penalties“ using the train classes specific to the standard. When toggling the option „Emission“ in this case, however, just a single source height will be used (see dialog Geometry of the „Railway“ object, usually 0.6 m above the railhead).
Train Classes and Penalties
With this option activated the number of trains for the guideline-specific train classes can be selected from a list (so-called „List of Trains“). In this case, CadnaA calculates the resulting emission level from the input data automatically (see guideline-specific chapters).
Note
In CadnaA, the emission spectrum is linear (unweighted), while the sum level is A-weighted („Tot-A“).
There are two alternatives to define a list with number of trains:
-
By editing the local table on the dialog Railway. To this end, select the option „(local)“ from the list box.
-
By referencing an existing list with number of trains available from the Tables menu, Libraries (local)|Number of Trains. To this end, select the name of the train list from the list box.
Number of Trains
Editing a local list
Use the context menu commands to insert new lines to the local train list.
Editing the local table is useful only when just a single railway section is concerned. In practice, a railway track has to be split into several sections due to changing parameters relevant for emission (such as track type or bridge penalty). With a local train list this would mean that with any small change (e.g. in the numbers of trains) each individual section would have to be reedited. To avoid this effort a list with number of trains is defined and referenced via the box „List of Trains“ for all relevant railway sections.
Library Number of Trains
Via the table Numbers of Trains (Tables menu, Libraries (local)) a table listing the number of trains for all railway classes travelling on a railway track can be compiled. To achieve this reference is established to the railway classes available from the local or global library (menus Tables|Libraries (global)| Railway Classes or Tables|Libraries (local)|Railway Classes). Subsequently, this list Numbers of Trains is referenced on dialog Railway by selecting its name. It is also possible to select Numbers of Trains for railway objects via the table Railway (on the Tables|Sources menu).
This procedure has - compared with a local train list - the advantage that any changes in the table Numbers of Trains (Tables menu, Libraries (local)) have to be edited once only, but will effect all railway section referencing that list. In either case, the change will be addressed to all railway sections referencing this list of trains.
Example
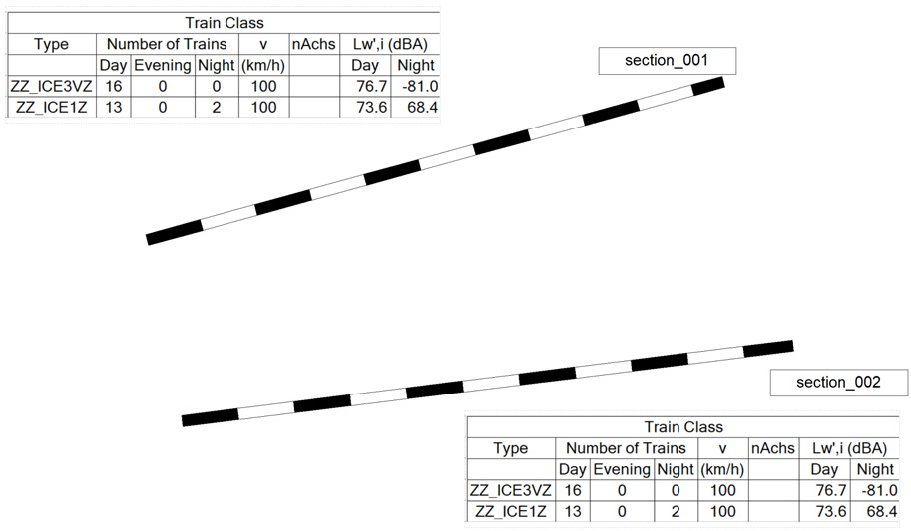
In the subsequent example, the list “train_list_1“ from the local library is referenced in the two railway sections.
The number of trains for the first train class (‘ZZ_ICE3VZ’) is changed from 16 to 32 trains in the Train numbers dialogue Numbers of Trains (Tables menu, Libraries (local)).
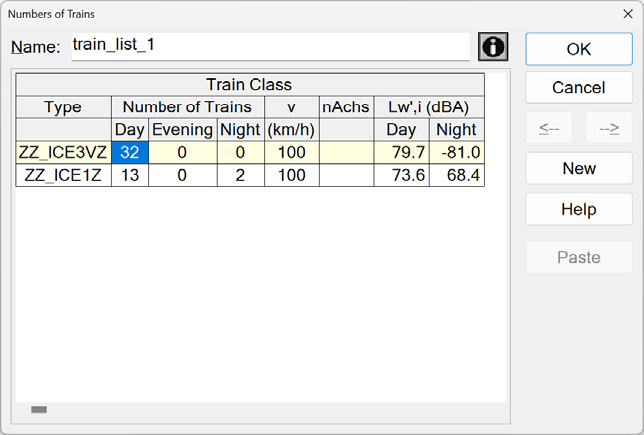
Upon confirming the dialog by OK the change will be become relevant to both railway sections „section_001“ and „section_002“ which are referencing this train list.
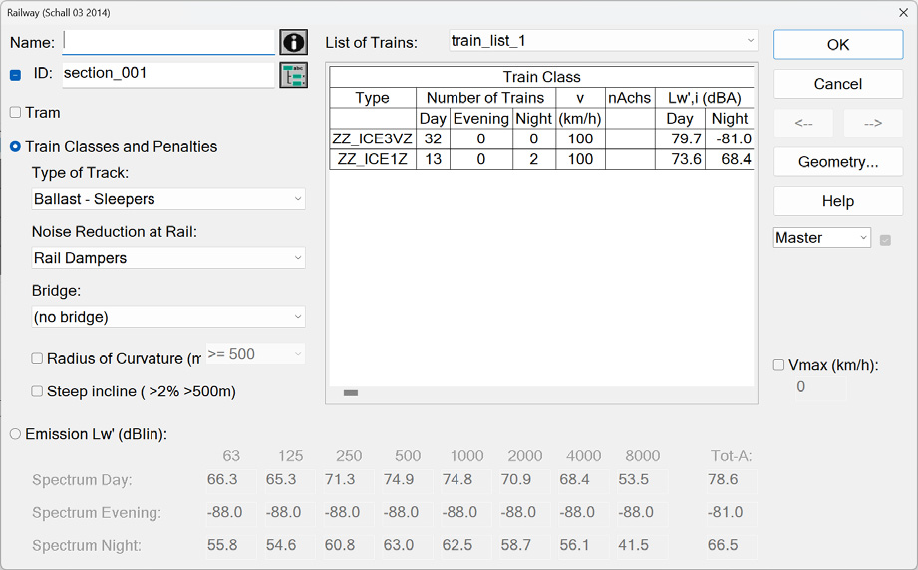
The change to the train numbers can be seen in both railway dialogues.
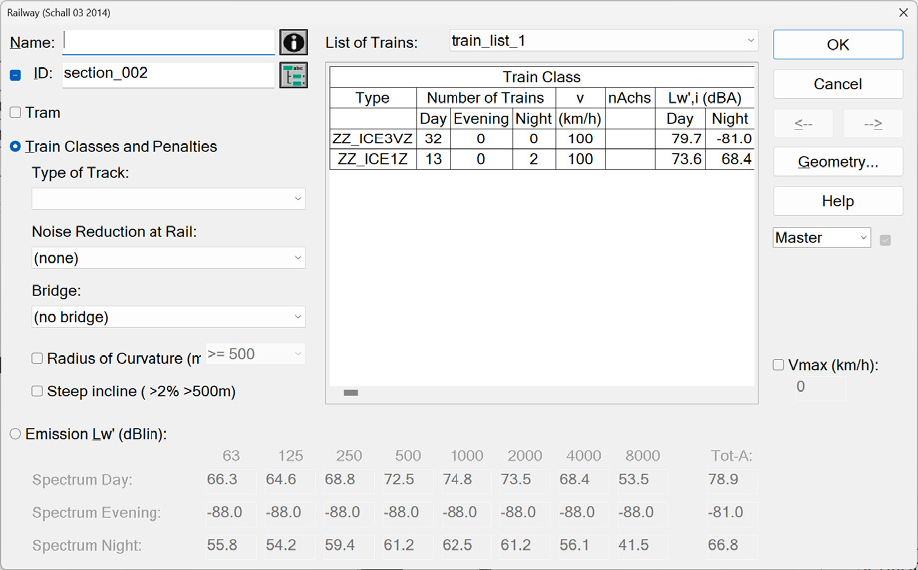
In the case of a change to the train number list in the local library, this will take effect for all railway objects that reference this list.
Note
Numbers of Trains can only be edited in the Railway dialogue if ‘(local)’ is selected in the List of Trains. If Numbers of Trains from the library are selected, local editing in the Railway dialogue is not possible. When switching from Numbers of Trains from the library to (local) in the List of Trains, the Numbers of Trains are transferred to the local list and can be edited there.
Edit Boxes for Railway Classes
The input boxes for each train class within the train list depends on the selected guideline for railway noise and will be explained in the following guideline-specific chapters.
Import Number of Trains
Lists with Number of Trains can be imported and exported (File menu, command Import and. Export).
see Import / Export of Numbers of Trains
and regarding import operations: Creating & Addressing Lists with „Number of Trains“ in the manual „Introduction to CadnaA“ (including an example)
Purging Tables with Number of Trains
When files containing train lists are imported, those train lists will be appended to the existing train lists. In order to prevent the list from increasing in length, select the command Purge Tables from the Tables menu to update this list with number of trains. Subsequently, all train lists not being referenced by any railway section will be deleted.
Dialog Geometry
Source Height
The height entered in the dialog Geometry corresponds with the rail’s top edge (railhead). The default value is 0.6 m (relative height).
Self-Screening
When the option „Self-Screening“ on the dialog Geometry is activated the railway is just radiating into the upper half sphere. For the lower half sphere a screening effect occurs for all receivers below the railroad’s surface. This feature enables to define inclined railway lines, either upwards or downwards, by allocating the height above (relative) ground or an absolute height to every point of the railway, and by defining an additional width (e.g. considering sidewalks etc.). Since the option „Self-Screening“ is available, the use of the object „Bridge“ became superfluous (see Bridge).
For the calculation when using the self-screening option, see Common Input Data, Self-Screening.
Additional Width left/right
With the self screening-option activated, the actual width of the railway line can be specified by entering an additional width > 0 m. The additional width can be defined separately for either side of a railway line.
The graphical representation of the object „Railway“ (also on 3D Special View) does not consider the additional width (so, being different from the object „Road“). The specified additional width will, however, be considered upon calculation. The same holds in the same way for the additional parapets left/right.
Parapet left/right
In addition, parapets (e.g. parallel barriers) for the self-screening road can be defined, either on one or both sides by entering a height left/right > 0 m. The parapets are treated as fully absorbing on either sides. This characteristic cannot be changed. Absorbing or reflecting barriers without or with cantilever can be defined just by using the object „Barrier“ (see Barrier).
The following requirements and properties are to be respected:
- In any case, the additional width has to be > 0 m.
- The parapets defined via option „Self-Screening“ are a characteristic of the railway and are not displayed in the 2D-graphics and not in the 3D-Special view (see 3D-Special View) for the time being.
- Barriers defined via option „Self-Screening“ will just screen the own source (railway), but not the noise from other kinds of sources.
- When calculating the effect by self-screening, in general no projection is considered, even if the corresponding option is active (see Partition Tab).
Stationing from/to
This option enables to restrict the length of the barrier along the railway’s axis with reference to the stationing. In this case, the barrier is just generated for the range „from-up to“.
This option is particularly useful when modeling bridges in order to suppress the diffraction around the edge of the railway sections at bridgeheads.
For the automatic assignment two attributes are available:
- station start: SSCR_ST_B
- station end: SSCR_ST_E
only for Ground Absorption, no Screening
With this option being activated, the additional width entered will not cause any screening effect, but will just be considered when calculating ground absorption. This requires, however, that the respective option on the configurations is checked (dialog Calculation|Configuration, tab „Ground Absorption“, option „Roads/Parking Lots are reflecting G=0“, see Ground Absorption Tab). With this option activated the speed of calculation may increase considerably due to the omission of barrier calculation.
The self-screening effect of the road’s surface - including parallel barriers, if any - just refers to the respective road itself. Thus, the parallel barriers (parapets) defined via „Self-Screening“ are not seen by other sources.