Modify Attribute
With this action the object’s attributes of a single or several object types can be modified globally (for available object attributes see chapter Object Attributes). With several object types selected, the common attributes are displayed on the list box „Attribute“.
For further information regarding the options „Arithmetic“ and „Replace Strings“ see Context Menu in Tables.
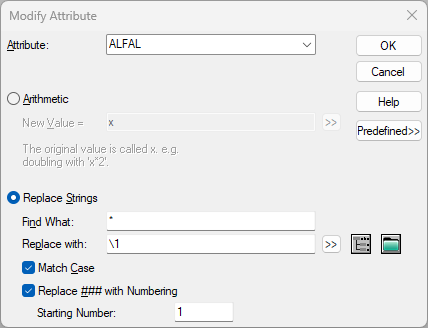
Dialog Modify Objects
Referencing a spectrum

Depending on the selected attribute, an entry from the corresponding local library (+SHIFT for global library) can be selected during string replacement with the file selection icon.
Adding to the ObjectTree

With ID as attribute, a corresponding ObjectTree group can be selected during string replacement with the ObjectTree symbol. Alternative procedure see Change ObejctTree assignment.
Defaults
Via this button a predefined setting with the corresponding expressions can be selected.
Setting „Default“
resets to the initial settings
Setting „remove from ObjectTree“
With this predefined setting the concerned objects can be removed from the ObjectTree by using the option „Replace Strings“ and without deleting these objects.
„Save As“ command
enables to save the current settings with a designation to be entered
File Location
The user-defined settings are saved to the file modattr.ini having the file path C:\Users\USERNAME\AppData\Local\Datakustik\CadnaR.
Examples
Naming of objects
The name of point sources shall be defined automatically. In addition to the name, a two-digit number shall be attached.
- Enter several point sources.
- Click with the right mouse button into the white area of the CadnaR main window and select the command Modify Objects from the context menu.
- Select the action „Modify Attribute“ and mark the object type „Point Source“.
- Keep the setting „all“ for option „Activation“.
After clicking OK the dialog Modify Attribute is displayed.
- Select the attribute BEZ from the list box, activate the option „Replace Strings“ and enter in box „Replace with“ the string: point source ##
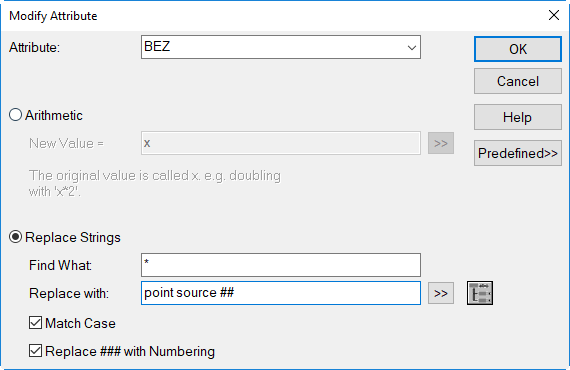
Replacing attribute BEZ by „point source“ plus a numbering
- Click on OK and confirm the safety query by „All“.
Study the result of the action via the table Point Source (on the menu Table|Sources). In the same way the ID of objects be generated automatically.
Changing object height
The height of all box-type obstacles in the project shall be changed to 3 m. Proceed as follows:
- Enter several box-type obstacles.
- Select the command Modify Objects from the context menu of the CadnaR main window.
- Select the action „Modify Attribute“ for all box-type obstacles.
- On dialog Modify Attribute, select from the list box the attribute Z2 (height at object’s 2nd point), activate the option „Replace Strings“ and enter the new value 3.
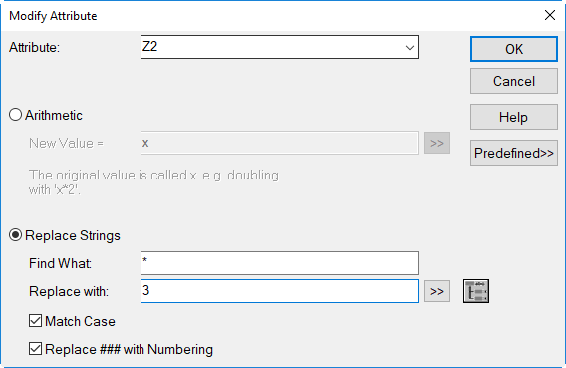
Setting attribute Z2 (object’s 2nd point) to 3 m
Note
In this case, it is not relevant whether the option „Arithmetic“ or „Replace Strings“ is used.
- Click on OK and confirm the safety query by „All“.
As visible from the table Box-type Obstacle that the object heights have been changed to 3 m.
Increasing object height by a height difference
The height of all barriers in the project shall be raised by 1 m based on the existing heights. Proceed as follows:
- Enter several barriers.
- Select the command Modify Objects from the context menu of the CadnaR main window.
- Select the action „Modify Attribute“ for all barriers.
- On dialog Modify Attribute, select from the list box the attribute Z2 (height at object’s 2nd point), activate the option „Arithmetic“ and enter the following expression: x+1
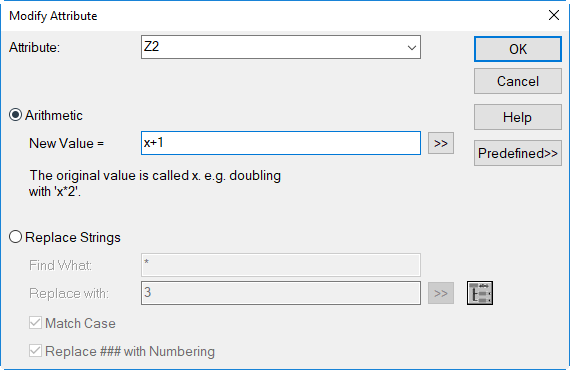
Increasing attribute Z2 (object’s 2nd point) by 1 meter
- Click on OK and confirm the safety query by „All“.
As visible from the table Barrier each object height has been changed by 1 m.
Auxiliary Polygon: Changing the Color
The line and fill color of auxiliary polygons can be defined using the action „Modify Attribute“. Deactivate the auxiliary polygons whose color shall not be changed, if required.
To change color of the auxiliary polygons, proceed as follows:
- Enter several auxiliary polygons.
-
Deactivate some auxiliary polygons by clicking on their respective edit dialogs on the small box in front of the ID until no hook is displayed and the ID is in red (
 ).
). -
Select the command Modify Objects from the context menu of the CadnaR main window.
- Select the action „Modify Attribute“ for the auxiliary polygons.
- On dialog range „Activation“ select to restrict the selection to the active objects of the object type „Auxiliary Polygon“.
- Click on OK.
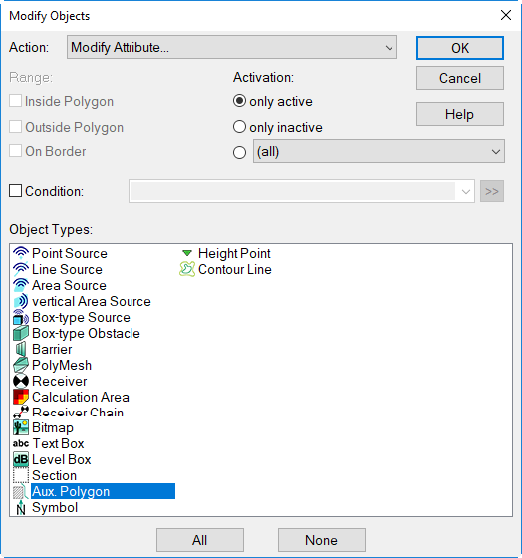
Modifying an attribute of the active auxiliary polygons
- Select from the list box the attribute L_COLOR for line color.
- Switch to a red color enter at „Replace Strings“: 255,0,0
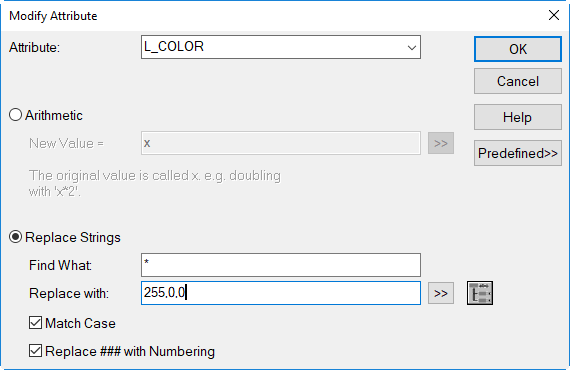
Changing the color of the auxiliary polygons to RGB(255,0,0)
Note
The figures stand for the RGB colors red, green and blue.
- Click on OK and confirm the safety query by „All“.
Global Properties on/off
If the color of the auxiliary polygons didn’t change, the reason is that the option „Use Global Properties“ is active per default. In this case, the settings for auxiliary polygons on the dialog Appearance are applied (see Appearance).
To alter this setting proceed as follows:
- Select on dialog Modify Attribute the attribute GLOBAL.
- Enter a space into box „Replace with“.
Note
The blank is interpreted as „off“ while the character x is interpreted as „on“.
- Click on OK and confirm the safety query by „All“.
From the dialogs of the auxiliary polygons it can been acknowledged that the color setting was changed just for the active auxiliary polygons.
Note
The attribute F_COLOR can be used to alter the fill color of closed auxiliary polygons.
Note
In the same way the text color of text and level boxes can be altered (attribute FONTCOLOR, see Object Attributes).
Writing a string variable to an attribute
For each object one or more string variables can be entered manually on the dialog Memo-Window (see Common Input Data, Defining Text Variables). In addition, for various import operations unknown attributes can be imported as string variables. By using the operation described below, the values of string variables can be read and written to CadnaR attributes.
Note
The operation can be applied to both, numerical and text attributes. In case text strings are copied to numerical CadnaR attributes, however, their value may be set to zero. There is no restriction when copying numerical values to text attributes. Note the restrictions in the case of the attribute ID (see Common Input Data, ID).
In this example, the value of the string variable „year“ from the dialog Memo-Window of point sources is copied to the attribute BEZ (Name)..
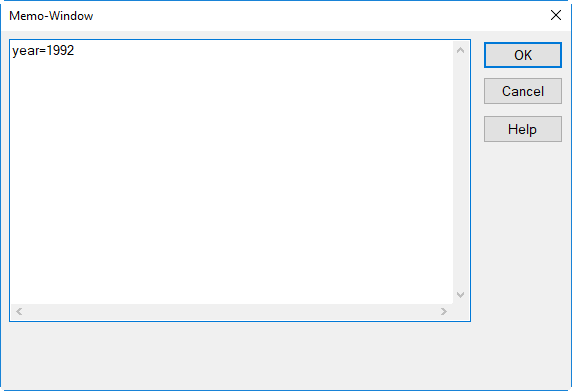
Dialog Memo-Window of a receiver showing the string variable STI_male.
This task requires the following steps:
- Enter some emitting point sources and receivers.
- Define the string variable „year“ in its memo-window and address a value by using the equal sign (without any blanks in between).
- Click with the right mouse button on the white area in the CadnaR main window.
- Select the command Modify Objects from the context menu.
- On dialog Modify Objects, select the action „Modify Attribute“ for the object type „Point Source“ and click OK.
- On the dialog Modify Attribute select the attribute BEZ (Name) from the list box „Attribute“.
- Select the option „Replace Strings“ and enter:Find what: *Replace with: {MEMO_year}
Note
For convenience you may select the attribute MEMO directly from the attribute list (>>) and then add to the following string inside the braces: „_STI_male“.
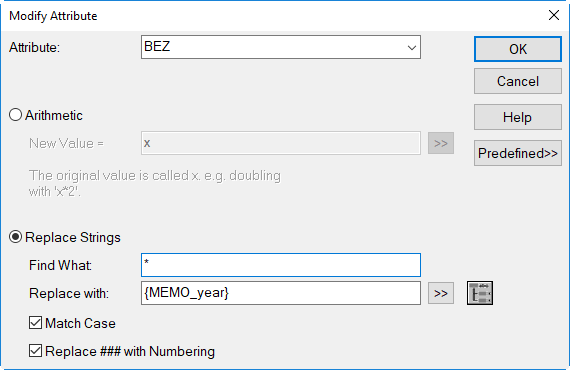
After executing the action by clicking OK, the value of the string variable „year“ is copied to the attribute BEZ of the all active point sources.
Writing an attribute toa string variable
The adverse operation compared with the previous example is also possible. In this example, the ID of point sources shall be written into a string variable named ID_ORIG stored in the Memo-Window.
This task requires the following steps:
- Click with the right mouse button on the white area in the CadnaR main window.
- Select the command Modify Objects from the context menu.
- On dialog Modify Objects, select the action „Modify Attribute“ for the object type „Point Source“ and click OK.
- On the dialog Modify Attribute select the attribute MEMOTXTVAR (addressing a string variable) from the list box „Attribute“.
- Enter in the additionally displayed input box „Text Variable“ the name of the text variable to be used: ID_ORIG.
- Select the option „Replace Strings“ and enter:Find what: *Replace with: {ID}
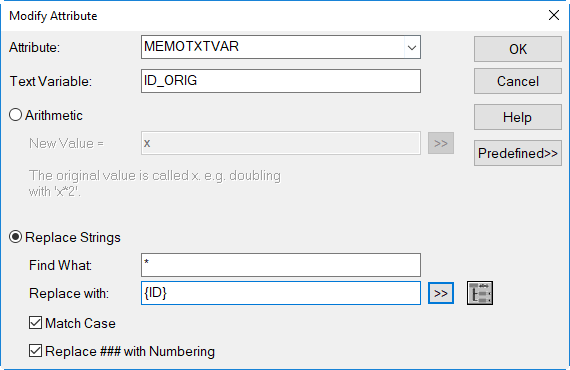
For convenience you may select the attribute ID directly from the attribute list (>>).
In this case, the option „Arithmetic“ could be used instead („New Value“ = ID, without braces). Consider the restrictions when replacing numerical attributes with strings.