Generate Label
This action/command generates a text box located aside of the object displaying one or several object parameters. The command Generate Label is available:
- on the context menu of an object or
- for several and/or different kind of objects via the dialog Modify Objects, action „Generate Label“.
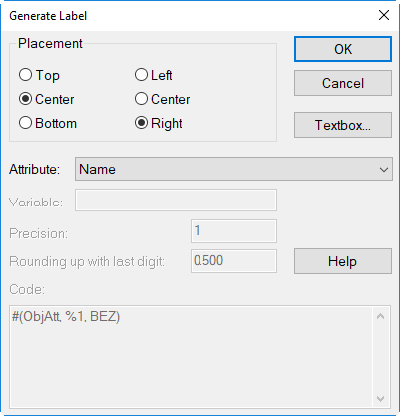
Dialog options
Placement
The placement defines the alignment of the content inside the label.
Attribute
Select the relevant attribute by clicking in the list box. The range of attributes in the list box depends on the selected object type (see Object Attributes). When using this command via the dialog Modify Objects to label different types of objects at once, no attributes will be offered, but can be entered manually (e.g. BEZ and ID).
- option "(String variable)": This selection the string variable’s name can be entered into the box "Variable" (see example).
- option "(user defined)": With this selection, the text within the box "Code" can be edited (see examples below).
Rounding up with last digit
These settings are just relevant with numerical attributes.
Button „Text box“
This button enables to select font type, font alignment, size and style.
Examples
Defining size and font type
By specifying the settings of a label manually (e.g. the size of the box, font type, size, style and color) they will be subsequently inherited to further automatically generated labels. In order to modify these settings all over again, define a new, manually generated label with modified settings.
Selecting an attribute
Select the desired attribute (e.g. Name) from the list box of the dialog. After execution of the action, the object’s name is displayed at the selected location aside of the object.
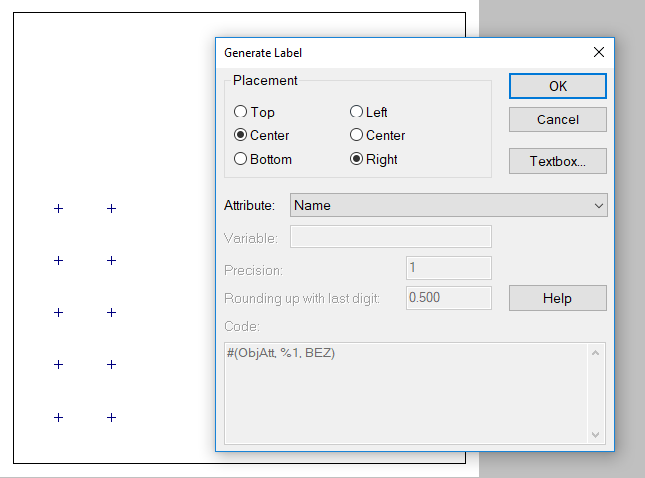
Example: point sources with labels showing the object’s name
Option „String variable“
The option „(String variable)“ enables to display an object-specific string variable, which is located in the memo-window of each object concerned. If not such a string variable is found, nothing is displayed.
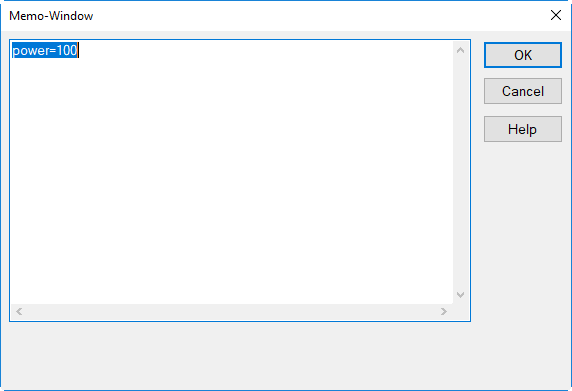
Example: point sources with string variable „Power“ in kW
- First, select the command Modify Objects, action "Generate Label", in this example for all point sources.
- In order to display the string variable "Power" inside a label, select option "(String variable)" and enter the variable’s name "Power".
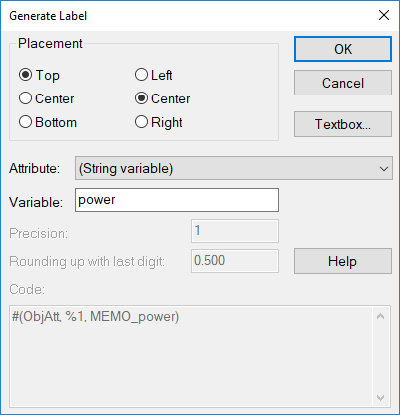
Example: displaying the value of string variable „Power“ in a label
Note
By this operation, the resulting value of a room acoustical parameter (see "RIR-Evaluation" tab) from the Memo-Window of one or more receivers can be written into a label, for example showing the STI_male (Speech Transmission Index).
Option „user defined“
The option "(user defined)" enables to edit the code used when generating the label. For example, assume we would like to add the unit after the value. Proceed as follows:
- First, select the command Modify Objects, action "Generate Label" for all point sources.
Note
Alternatively, the command can be selected from the context menu of an object. In this case, a label is generated just for this object.
- Select from the list box "Attribute" the option "(String variable)" and enter the variable’s name "power".
- Now, select from the list box "Attribute" the option "(user defined)" and add the text in the input box "code" by "kW".
Now, the dialog looks as follows:
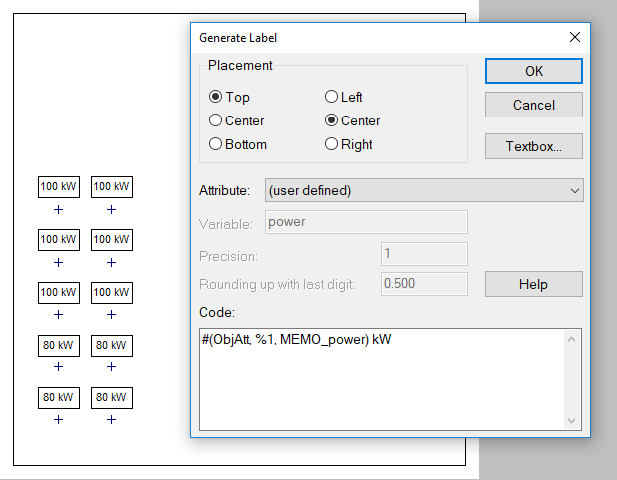
Example: displaying the string variable „power“ plus its unit in a label
Furthermore, the options "(user defined)" enables to display multiple attributes inside a single text box. In the following example, the name and ID are displayed in a single text box.
- Select from the list box "Attribute" on dialog Generate Label the attribute "Name".
- Now, select from the top of the list "Attribute" the option "(user defined)".
- Complete the code as shown below:Name = #(ObjAtt, %1, BEZ)ID = #(ObjAtt, %1, ID)
Note
Also in this case, additional text can be entered.
Now, the dialog looks as follows:
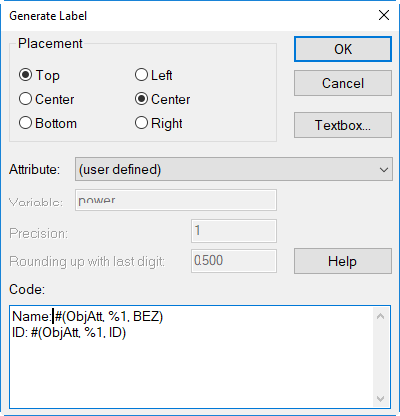
- Adjust the size of the text box as required (see Defining size and font type).
Save/delete label format
With option „(user defined)“ selected click the button „Predefined >>“ the option „Save as“ to save the label and its user-defined coding. Enter, for example, the name „LP1 and limit“.
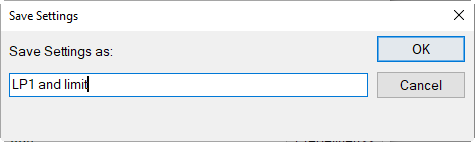
After clicking OK, this new label format can be selected from the „Predefined“ button. Existing label formats can be removed using the „Delete“ command.